
Introduction to the Basics
Processing with ESP8266 that lets users enter text and send it to a NodeMCU (ESP8266) via an HTTP GET request. The text will be transmitted over the network, and the NodeMCU will process it accordingly. I’ll also use the ControlP5 library to create a basic graphical interface for easy user interaction.By the end of this tutorial, you will learn how to:
- Create a simple text input field in Processing.
- Capture the text input.
- Send the text data to a NodeMCU (or any web server) via HTTP.
Setup and Prerequisites
Before you start processing with ESP8266, ensure you have the following components and setup ready:
- Processing IDE installed on your computer. You can download it from processing.org.
- ControlP5 library installed in Processing. You can install it by going to the Sketch > Import Library > Add Library and searching for ControlP5.
- Arduino IDE installed on your computer. You can download it from arduino.cc.
- A NodeMCU (ESP8266) or similar microcontroller connected to your network.
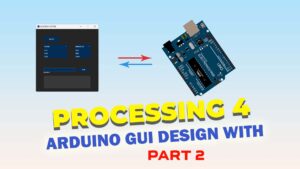
Interested in Designing GUI for Arduino? Easy Guide for Beginners – Processing4
Using GUI for Arduino involves creating graphical interfaces that allow users to interact with Arduino projects visually. By designing GUIs, users can control and monitor Arduino devices using buttons, sliders, and other graphical elements instead of relying solely on text-based interfaces.
Click HereCreating a GUI to Send Data Wirelessly
Processing with ESP8266: Create a Text Field
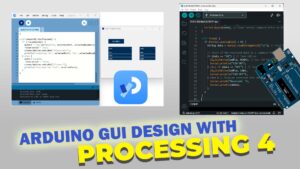
Alright, let’s create a simple interface where you can type some text into a text field using the ControlP5 library. This will involve creating a window with a text input field, where users can type text, and displaying it on the screen. We’ll walk through the steps one by one to set this up in Processing.
Importing the ControlP5 Library
Processing does not have built-in GUI elements, so we use the ControlP5 library to create a text input field. First, we need to import the library and declare an instance of it. Next, we declare an instance of ControlP5 with ControlP5 cp5;. This line creates a variable called cp5, which will hold the reference to the ControlP5 library that we will use to add and manage our GUI elements.
import controlP5.*;
ControlP5 cp5;
Setting Up the Window
Processing runs a setup() function when the program starts. Here, we define the window size and initialize ControlP5:
void setup() {
  size(400, 200);
  cp5 = new ControlP5(this);
}
Adding a Text Field
Now, we add a text field to our GUI using cp5.addTextfield("textInput"). This method creates an input box for users to enter text. We also position and size the text field:
cp5.addTextfield("textInput")
     .setPosition(50, 50)
     .setSize(300, 30)
     .setLabel("Enter Text")
     .setAutoClear(true);
The .setAutoClear(true) ensures that the field resets after the user presses Enter.
Drawing the Interface
We need a draw() function to keep the display updated:
void draw() {
  background(200);
}
At this stage, we have a functional input field. Now, let’s extend it by capturing the user’s input.
Processing with ESP8266: Capture Data from the Text Field
Now, let’s extend the functionality by incorporating a feature that updates a status message based on the text entered in the text field.
Adding a Status Message
To achieve this, we first introduce a new string variable called statusMessage. This variable will store the message displayed to the user. Initially, it holds the message “Enter text and press Enter,” which will be shown on the screen as an instruction to the user.
String statusMessage = "Enter text and press Enter";
Displaying Messages on the Screen
To display the status message on the screen, we modify the draw() function:
void draw() {
  background(200);
  fill(0);
  textSize(16);
  textAlign(CENTER, CENTER);
  text(statusMessage, width / 2, 150);
}
Capturing User Input
Processing provides a callback function for text fields. We define textInput(String theText), which triggers when the user presses Enter:
void textInput(String theText) {
  if (theText.trim().isEmpty()) {
    statusMessage = "Please enter some text!";
  } else {
    statusMessage = "You entered: " + theText;
  }
}
At this stage, we have a basic GUI that allows users to type text and see feedback. Now, let’s move on to forming a URL to send this data.
Processing with ESP8266: Forming a URL
Let’s take things a step further by adding a feature that sends the entered text as an HTTP GET request to a server. This allows us to dynamically send data over the network once the user types something in the text field.
Defining the Base URL
We define the ESP8266’s IP address: [ Replace with your NodeMCU IP address ]
String ipAddress = "192.168.1.100";
Encoding and Formatting the URL
To ensure the URL works correctly, we encode the text input to handle spaces and special characters so add this import statement at the beginning of your code.
String ipAddress = "192.168.1.100";
URLEncoder is part of Java’s java.net package, and Processing doesn’t automatically import it. You need to manually import java.net.URLEncoder.
void textInput(String theText) {
  if (theText.trim().isEmpty()) {
    statusMessage = "Please enter some text!";
    return;
  }
  try {
    String encodedText = URLEncoder.encode(theText.trim(), "UTF-8");
    String url = "http://" + ipAddress + "/receive?text=" + encodedText;
    statusMessage = "URL formed: " + url;
  } catch (Exception e) {
    statusMessage = "Error encoding text!";
  }
}
At this point, we have a properly formatted URL. Now, let’s send it over the network.
Processing with ESP8266: Sending the Data via HTTP
Now, we enhance the functionality by adding the ability to send the formed URL as an HTTP GET request to the NodeMCU. After forming the URL from the text input, we use Java’s HttpURLConnection to make a network connection and send the request.
Importing Required Libraries
To make the HTTP GET request functionality work, you need to import the required Java packages. These packages provide the necessary classes to handle network connections and data transmission. Specifically, you’ll need to import java.net.* for working with URLs and the HttpURLConnection class, as well as java.io.* to handle input/output streams for the HTTP request.
At the top of your code, you should include these import statements:
import java.net.*;
import java.io.*;
In the textInput() function, once the URL is formed, we proceed by trying to establish a connection to the URL using HttpURLConnection. We create a URL object from the url string, and then open a connection using openConnection(). We set the request method to “GET” using setRequestMethod(“GET”), which specifies that this is a GET request. To actually send the request, we invoke getInputStream(), which triggers the HTTP request.
void textInput(String theText) {
  if (theText.trim().isEmpty()) {
    statusMessage = "Please enter some text!";
    return;
  }
  try {
    String encodedText = URLEncoder.encode(theText.trim(), "UTF-8");
    String url = "http://" + ipAddress + "/receive?text=" + encodedText;

    // Open connection
    URL myURL = new URL(url);
    HttpURLConnection connection = (HttpURLConnection) myURL.openConnection();
    connection.setRequestMethod("GET");
    connection.getInputStream();

  } catch (Exception e) {
    statusMessage = "Failed to send text!";
  }
}
}
However, if an error occurs (for example, due to network issues or invalid URL), an exception will be caught, and the program will print an error message to the console and update the status message to “Failed to send text!” This provides immediate feedback to the user about whether the operation succeeded or not.
Now, when the user types and presses Enter, the text is sent to the ESP8266.
Processing Complete Code:
Receiving and Handling Data from Processing
Now we’ll set up an ESP8266 as a web server that listens for incoming text data via an HTTP GET request.
Processing with ESP8266: Setting Up the Web Server
First, we need to set up the ESP8266 to connect to WiFi and start a web server. Let’s go step by step.
Including Required Libraries
We need the ESP8266WiFi and ESP8266WebServer libraries. These allow us to connect to WiFi and set up a web server.
#include "ESP8266WiFi.h"
#include "ESP8266WebServer.h"
Defining WiFi Credentials
We define the SSID and password of our WiFi network so that the ESP8266 can connect to it.
const char* ssid = "Your_SSID";
const char* password = "Your_Password";
Creating a Web Server Instance
We create an instance of ESP8266WebServer that listens on port 80:
ESP8266WebServer server(80);
Connecting to WiFi
In the setup() function, we connect the ESP8266 to WiFi and print its IP address
void setup() {
  Serial.begin(115200);
  WiFi.begin(ssid, password);

  while (WiFi.status() != WL_CONNECTED) {
    delay(1000);
    Serial.println("Connecting to WiFi...");
  }

  Serial.println("Connected to WiFi!");
  Serial.print("ESP8266 IP Address: ");
  Serial.println(WiFi.localIP());
}
Now, the ESP8266 connects to WiFi and displays its IP address, which we’ll use to send data from Processing.
Processing with ESP8266: Defining the Web Server Route
Now that our ESP8266 is connected, let’s create an HTTP endpoint to receive text data.
Handling HTTP Requests
We define a route that listens for GET requests on /receive. This route will capture text data sent from Processing.
server.on("/receive", HTTP_GET, []() {
  String text = server.arg("text");
  Serial.println("Received text: " + text);
  server.send(200, "text/plain", "Text received: " + text);
});
Starting the Web Server
After defining the route, we need to start the server in the setup() function:
server.begin();
Serial.println("Server started!");
Now, the ESP8266 is ready to accept text data over HTTP.
Processing with ESP8266: Handling Client Requests
The loop() function continuously checks for incoming requests:
void loop() {
  server.handleClient();
}
Whenever Processing sends data, server.handleClient() processes it and responds.
ESP8266 Complete Code:
Working Demonstration
Here’s the proper workflow for setting up communication between your ESP8266 and Processing:
Run the ESP8266 Sketch First
- Upload the ESP8266 code to your board.
- Open the Serial Monitor in the Arduino IDE (baud rate: 115200).
- The ESP8266 will connect to your WiFi and print its assigned IP address.
- Copy this IP address.
Update and Run the Processing Sketch
- Open your Processing sketch.
- Replace the
ipAddressvariable with the ESP8266’s IP address. - Now, run your Processing GUI.
- Type some text and press Enter.
- The request will be sent to the ESP8266, and the ESP will print the received text in the Serial Monitor.
