Arduino libraries are collections of code that simplify complex tasks and make it easy for users to interface with various components such as sensors or display modules. In this tutorial, we’ll walk through the process of creating an Arduino library from a simple Arduino sketch. The example sketch blinks a series of LEDs, and we’ll convert it into a library for better organization and reusability.
The Simple LED Blink Sketch:
Let’s begin with a basic LED blink sketch. This is often the starting point for many Arduino enthusiasts, a simple program that blinks eight LEDs in sequence.
In this code, each LED’s pin configuration and blinking sequence are explicitly written out. While this approach is more repetitive, it might be easier to follow for those who are just starting with programming and want to see the individual operations for each LED.
Transforming into a Class-Based Structure
To make our code more modular, we’ll convert the simple LED blink sketch into a class-based structure. This is a fundamental concept in object-oriented programming and is particularly useful for managing complex projects.
let’s break down the provided sketch step by step:
Include Arduino Library:
#include <Arduino.h>
This line includes the Arduino library, which provides essential functions for working with Arduino boards. It’s necessary for any Arduino sketch.
Define Flasher Class:
class Flasher {
private:
int pin2, pin3, pin4, pin5, pin6, pin7, pin8, pin9;
This declares a class named Flasher. It has private member variables pin2 through pin9, representing the pin numbers for 8 LEDs.
Constructor for Flasher Class:
public:
Flasher(int p2, int p3, int p4, int p5, int p6, int p7, int p8, int p9) :
pin2(p2), pin3(p3), pin4(p4), pin5(p5), pin6(p6), pin7(p7), pin8(p8), pin9(p9) {
// Constructor to initialize LED pins
}
This declares a class named Flasher. It has private member variables pin2 through pin9, representing the pin numbers for 8 LEDs.
pinSetup Function:
void pinSetup() {
// Function to set up pin configurations individually
pinMode(pin2, OUTPUT);
pinMode(pin3, OUTPUT);
pinMode(pin4, OUTPUT);
pinMode(pin5, OUTPUT);
pinMode(pin6, OUTPUT);
pinMode(pin7, OUTPUT);
pinMode(pin8, OUTPUT);
pinMode(pin9, OUTPUT);
}
This function sets up the pin configurations for the LEDs as OUTPUT. Each pin is configured individually using the pinMode function
sequenceOne Function:
void sequenceOne() {
// Function to implement the LED blinking sequence with individual pin control
digitalWrite(pin2, HIGH);
delay(500);
digitalWrite(pin2, LOW);digitalWrite(pin3, HIGH);
delay(500);
digitalWrite(pin3, LOW);digitalWrite(pin4, HIGH);
delay(500);
digitalWrite(pin4, LOW);digitalWrite(pin5, HIGH);
delay(500);
digitalWrite(pin5, LOW);digitalWrite(pin6, HIGH);
delay(500);
digitalWrite(pin6, LOW);digitalWrite(pin7, HIGH);
delay(500);
digitalWrite(pin7, LOW);digitalWrite(pin8, HIGH);
delay(500);
digitalWrite(pin8, LOW);digitalWrite(pin9, HIGH);
delay(500);
digitalWrite(pin9, LOW);
}
This function implements a sequence where each LED blinks in turn. It sets a pin HIGH, waits for 500 milliseconds, and then sets it LOW. This process repeats for each LED, creating a sequential blinking effect.
Create an Instance of the Flasher Class:
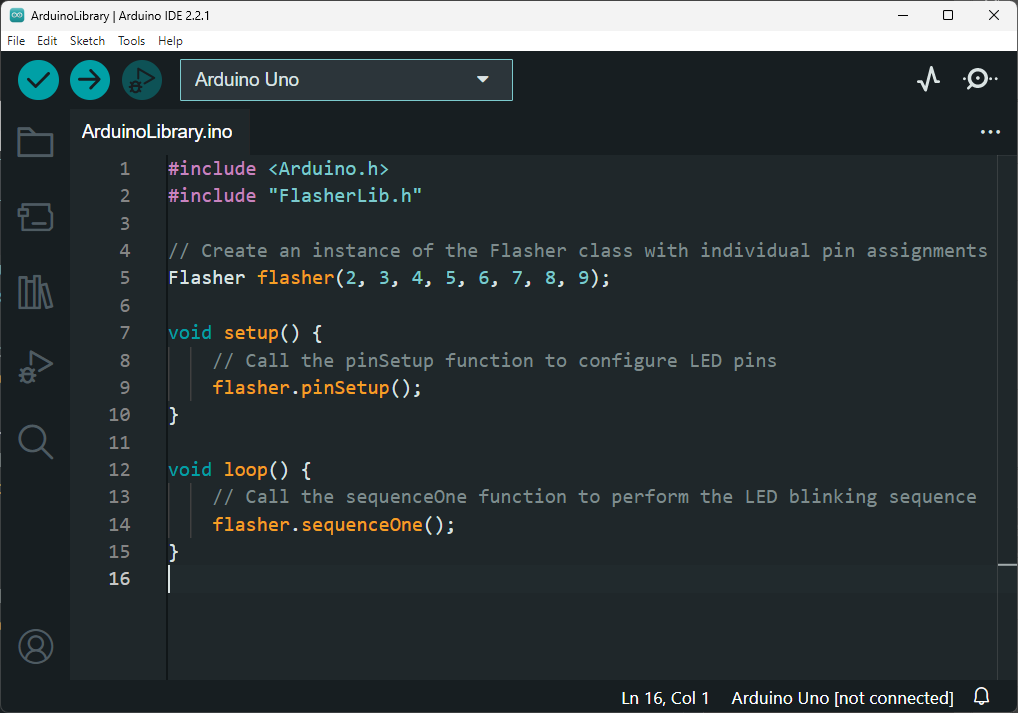
// Create an instance of the Flasher class with individual pin assignments
Flasher flasher(2, 3, 4, 5, 6, 7, 8, 9);
An instance of the Flasher class is created, named flasher, with individual pin assignments (2 to 9) for the LEDs.
setup Function:
void setup() {
// Call the pinSetup function to configure LED pins
flasher.pinSetup();
}
The setup function is an Arduino standard function that runs once when the Arduino is powered on or reset. In this case, it calls the pinSetup function to configure the LED pins.
loop Function:
void loop() {
// Call the sequenceOne function to perform the LED blinking sequence
flasher.sequenceOne();
}}
The loop function is an Arduino standard function that runs repeatedly after the setup function. It calls the sequenceOne function to execute the LED blinking sequence in a loop.
Creating an Arduino Library
Now, let’s take it a step further and transform our class-based sketch into a fully-fledged Arduino library. This will make our code more reusable across different projects. To convert the provided sketch into separate files for creating a library, you can follow these steps. Create a directory with the same name as your Arduino library (e.g., “FlasherLib”) and then create the following files inside that directory.
FlasherLib.h (Header file):
FlasherLib.cpp (Source file):
Now, you can create a zip file of the “FlasherLib” directory, and this zip file can be imported into the Arduino IDE as a library using the “Sketch > Include Library > Add .ZIP Library” option. After importing, you can use the #include <FlasherLib.h> statement in your Arduino sketches to include the Flasher library.

Adding a Keyword File
To enhance your Arduino library usability, you can create a keyword file for syntax highlighting in the Arduino IDE.
Create a text file: Open a text editor and save a new file as keywords.txt.
Write keywords: In the keywords.txt file, add keywords and their classifications. For example: flasher KW1
The keyword flasher is associated with the classification KW1.
Save the file: Save the keywords.txt file in the root of your Arduino library folder.
Arduino
└── libraries
└── Flasher
├── Flasher.h
├── Flasher.cpp
├── keywords.txt
└── examples
└── SimpleBlink
└── SimpleBlink.ino
Download Code
Checkout: How to use Multi Tab Arduino Sketch
Download the Source Code of the Arduino Library Tutorial and ZIP Password : electronicstree.com
ZIP Password : electronicstree.com
If you have any requests for Arduino Module Libraries in Proteus, please leave a comment or message us using the contact form.


