Arduino With Processing
Hello folks! Ever thought about making Arduino with Processing team up using Bluetooth? We’re about to dive into it! Imagine combining Arduino’s hardware with Processing’s code using the HC-06 module for a wireless connection. It’s like teamwork for cool projects that bring hardware and software together. Let’s break it down and see how this combo, Arduino with Processing, creates awesome interfaces! Ready? Let’s go!
Arduino With Processing: Background
Arduino:
Arduino is a microcontroller board that lets you sense the physical world and control devices like LEDs, motors, and sensors. It’s like a tiny computer with simple programming, making it accessible to beginners and experts alike.
Processing:
Processing is a visual programming language for artists, designers, and anyone who wants to create interactive graphics, animations, and visualizations. Its visual coding environment makes it easy to bring your ideas to life, even if you don’t have a traditional programming background.
Bluetooth: Arduino with Processing
The magic happens when you connect Arduino with Processing through Bluetooth. This wireless communication allows your Arduino to send data it collects from the physical world (sensor readings, button presses, etc.) to your Processing sketch. Processing, in turn, can use this data to manipulate visuals, play sounds, control motors, and create dynamic and interactive experiences.
Hardware Setup
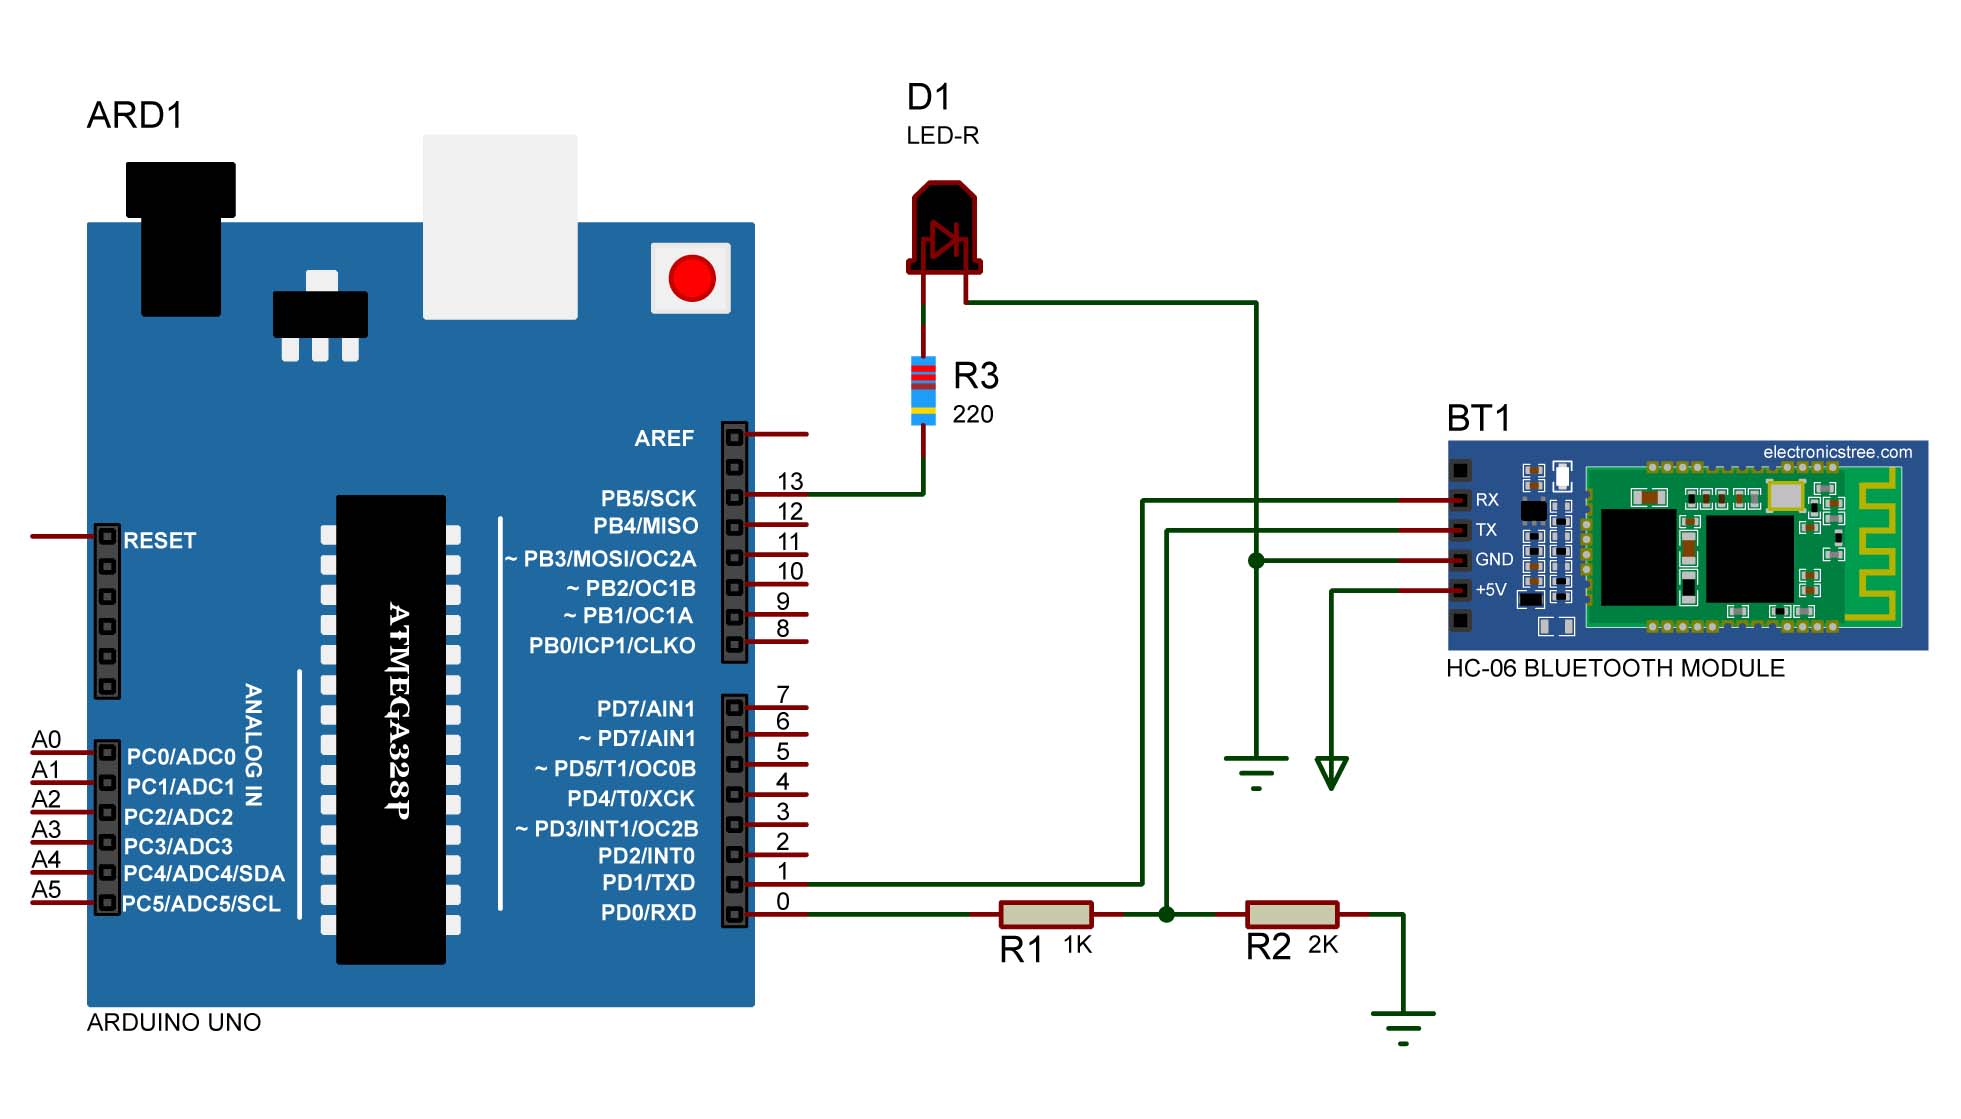
- Connect the HC-06 Bluetooth module to Arduino, remembering that the module operates at 3.3 volts.
- As the HC-06 breakout board supports an input voltage range of 3.3 to 6 volts, connect Arduino power in this range.
- Use a voltage divider, created with a 1k ohm resistor and a 2k ohm resistor, to interface the 5-volt Arduino with the 3.3-volt logic levels of the HC-06 module.
- Directly connect the Bluetooth module’s transmitting pin to the Arduino’s receiving pin.
- Power up Arduino and observe the Bluetooth module LED flashing.
- Pair your PC with the HC-06 module by navigating to the Bluetooth settings and adding a Bluetooth device.
- Identify the assigned serial port number (e.g., COM13) in the Bluetooth options.
Processing Setup:
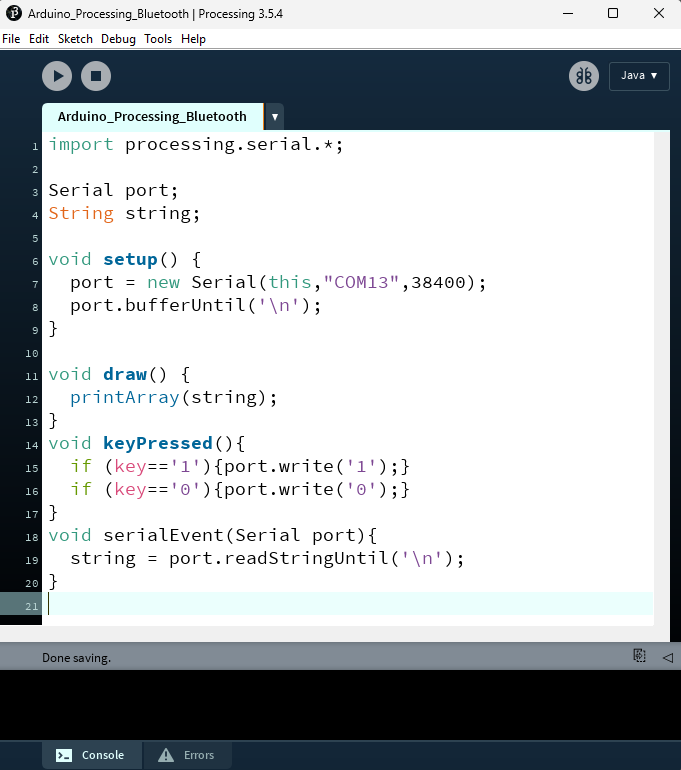
- Open Processing and create a new sketch.
- Import the Serial library to facilitate serial port access.
- Declare a Serial object named ‘port’ for data communication.
- Set up the serial port with the appropriate port number (e.g., COM13) and a baud rate of 38,400.
- Write code to buffer serial input and handle key presses for sending commands to Arduino.
Arduino Setup:
- Create a variable to receive data from the serial port.
- In the setup function, establish serial communication at 38,400 baud.
- In the loop function, use
serial.availableandserial.readto read incoming data. - Implement conditions to respond to the received data.
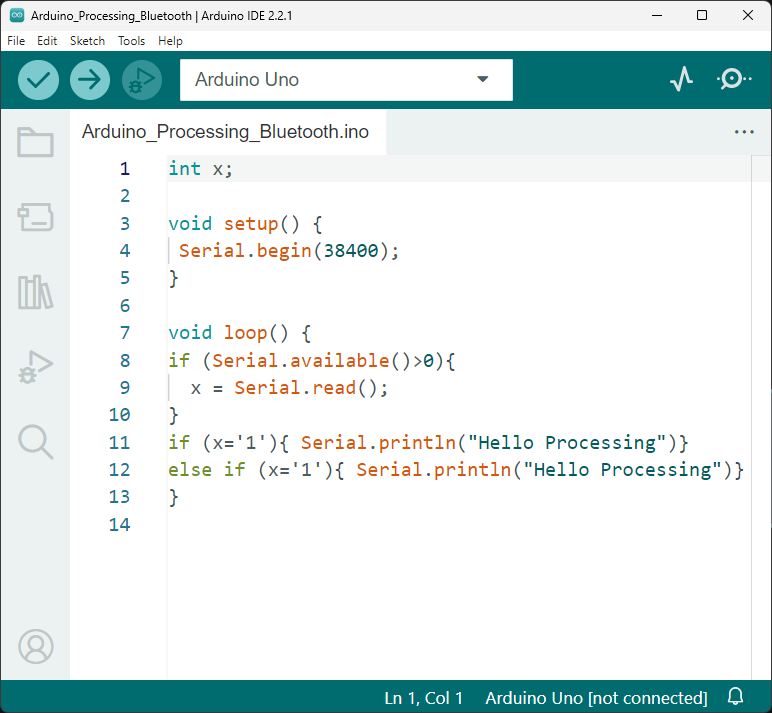
When you press the 1 or 0 key on the keyboard, Processing sends that value to the Arduino, and the Arduino replies back to Processing.
Arduino with Processing - GUI APP
I’ve added some cool features to the Processing sketch and created this awesome program. I’ve introduced various classes, such as Bluetooth Animation, Button, and Graphics. The Bluetooth Animation class lets you create animations that look like Bluetooth actions, the Button class helps in making buttons, and the Graphics class is handy for crafting titles and background images. All the cool functions from these classes will be put to use in the main sketch. Curious to see how it works? Check out this video!
Download Code
You can download the full Arduino with Processing application program by clicking the button above. I hope this tutorial gives you a good overview of Arduino with Processing Interface using Bluetooth. If you have any questions, feel free to ask!
Please wait 10 seconds: after that, your download will begin ⏳
ZIP Password : electronicstree.com
If you have any requests for Arduino Module Libraries in Proteus, please leave a comment or message us using the contact form.
Hi!Could you please share the Bluetooth module library files for Proteus simulation? THKS!