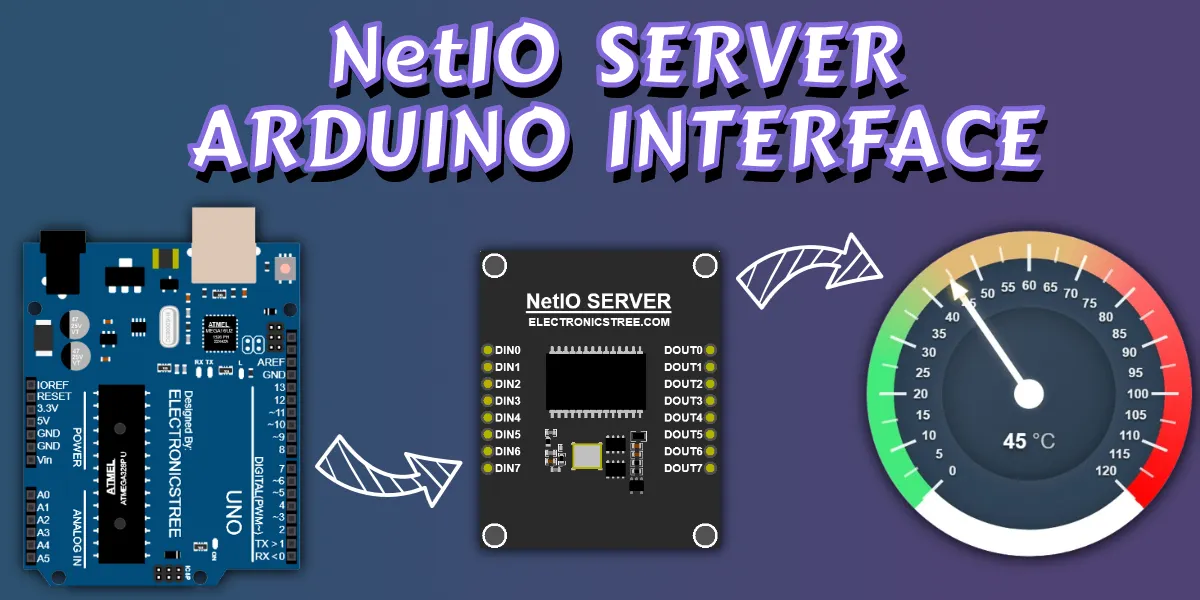
NetIO Server with Arduino
In this walkthrough, we’ll demonstrate how to interface a NetIO server with Arduino. Since the NetIO server accepts 8-bit parallel data, we can either use 8 Arduino digital pins or a shift register to bridge the gap. To save Arduino pins, we’ll go with the shift register method. In this project, we’ll read temperature data from an LM35 sensor using the Arduino, send it to the NetIO server, and finally build a simple web interface to display the temperature in a clean, readable °C format.
What You’ll Need
- Arduino Uno Proteus Model – Download Here
- LM35 Temperature Sensor – Already Available in Proteus
- 74HC595 shift register – Already Available in Proteus
- A NetIO SERVER Proteus Model – Download Here
- A basic web browser
Step 1: Wiring It All Up
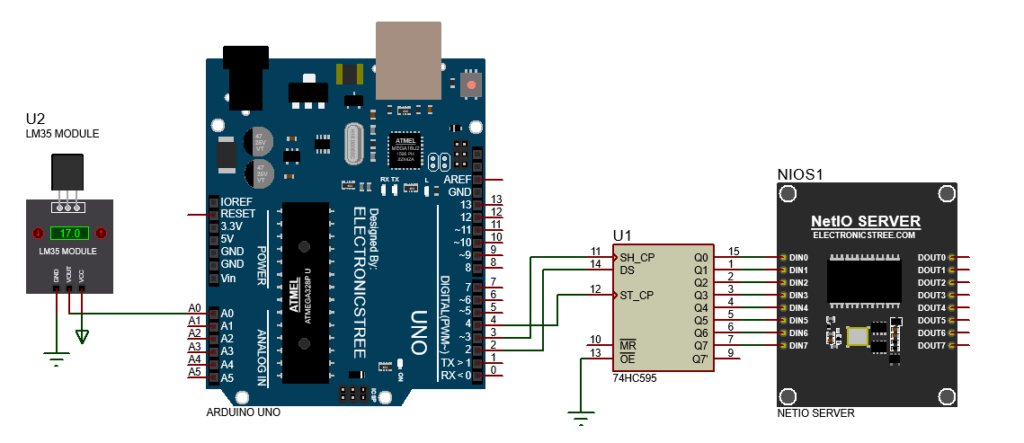
Connect the LM35 to the Arduino: Proteus Connection
| LM35 Pin | |
|---|---|
| VCC | Power Terminal (Proteus) |
| GND | GND Terminal (Proteus) |
| VOUT | A0 (Arduino) |
Connect the 74HC595 to Arduino: Proteus Connection
| 74HC595 Pin | Arduino |
|---|---|
| DS (14) | D2 |
| SH_CP (11) | D3 |
| ST_CP (12) | D4 |
| VCC/GND | Power/GND |
Then connect Q0–Q7 from the 74HC595 to the NetIO server’s 8-bit parallel input.
Step 2: Arduino Code
Now we’ll write code that:
- Reads the analog value from the LM35 sensor
- Converts the reading to temperature in °C
- Maps the temperature to an 8-bit value (0–255)
- Shifts the data out to the NetIO server
Now your NetIO server has a full 8-bit digital representation of your temperature!
Step 3: NetIO Server Setup
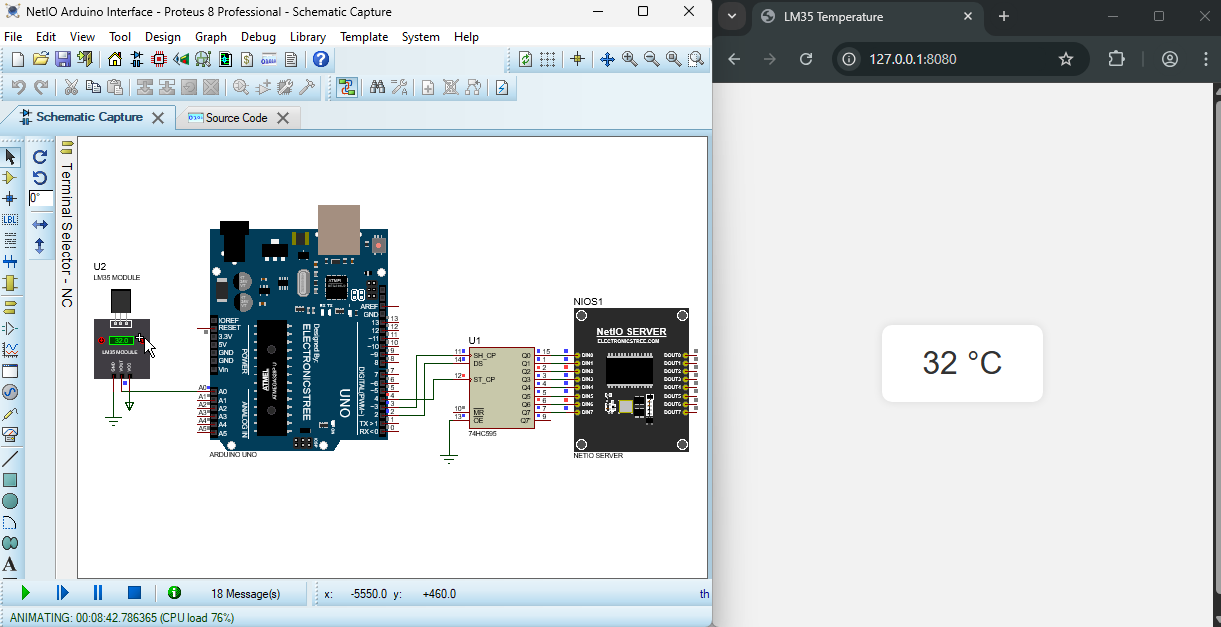
Now, create a folder named NetIO in the same directory where your Proteus project file is saved. Inside the NetIO folder, create an HTML file named index.html.
Next, let’s see how we can fetch data from the NetIO server. The NetIO server reads input data and returns a response in JSON format, like: { “value”: 173 }. The number 173 in binary is 10101101. Each bit in this 8-bit binary value corresponds to a digital pin state. This allows us to write JavaScript code that fetches temperature data from the NetIO server, processes it, and displays it on a web page.
The JavaScript code periodically sends a request to the server’s /get endpoint, dynamically using the current hostname to locate the device. Upon receiving the JSON response, it extracts the "value" field, which represents an analog reading between 0 and 255. This value is then scaled to a temperature range of 0 to 120 °C, rounded to the nearest whole number, and displayed prominently on the webpage.
NetIO Server with Arduino - Temperature Gauge
Using AI is an easy and effective way to create functional, customized web pages without needing advanced coding skills. Simply describe what you want, get the code from the AI, and test it in your browser.
Here, I’ve created a stunning temperature gauge that visually displays data from the NetIO server, making the interface both informative and engaging.


