If you are working with IoT simulations, you’ll be pleased to know that the ESP-01 Proteus Simulation Model can send real online data directly to cloud platforms. In this tutorial, we will connect the ESP-01 simulation to the internet and upload sensor readings to the ThingSpeak Cloud Server using real API calls.
This guide is ideal for beginners who want to explore and test HTTP client features inside Proteus without needing any physical hardware.
What Does “Client” Mean in ESP-01?
In networking, a client is a device that sends requests to a server.
When the ESP-01 works as an HTTP client, it can:
- Send data to a cloud service
- Request data from APIs
- Upload sensor values
- Communicate with online databases
In our case, the server is ThingSpeak, and the ESP-01 in Proteus is the client sending sensor values using AT+HTTPCLIENT commands.
What is ThingSpeak?
ThingSpeak is a free IoT cloud platform used for:
- Sending sensor values
- Creating graphs
- Storing data
- Visualizing real-time feeds
ThingSpeak provides a simple REST API that allows you to update your channel using HTTP requests such as GET or POST. This makes it perfect for testing HTTP GET requests from the ESP-01 Proteus Simulation Model.
Create a ThingSpeak Channel
- Sign in to ThingSpeak using your MathWorks Account, or create a new account if you don’t have one.
- Go to Channels > My Channels.
- On the Channels page, click New Channel.
- Enable Field 1 by checking the box.
- Name: Enter any name for your channel.
- Field 1: Give any label you want for your first data field.
- Click Save Channel at the bottom of the settings page.
After saving, you will see several tabs:
- Private View: Displays channel information that only you can access.
- Public View: Shows selected fields and visualizations if you choose to make your channel public.
- Channel Settings: Contains all the options you set during creation and allows you to edit, clear, or delete the channel.
- Sharing: Lets you set the channel as private, public, or shared with specific users.
- API Keys: Displays your Read and Write API keys, which are used to interact with your channel through HTTP requests.
- Data Import/Export: Allows you to import or export your channel data.
From the API Keys tab, copy the Write API Key, you will need this key to send data to your channel. ThingSpeak also provides ready-made API request URLs that you can use directly in your ESP-01 commands. For the easiest setup, simply copy the API request URL from this tab and use it in your HTTP client request. Your API Request URL looks like this:
https://api.thingspeak.com/update?api_key=YOUR_KEY&field1=value
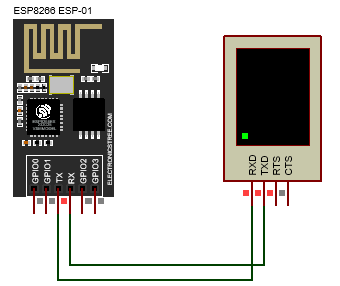
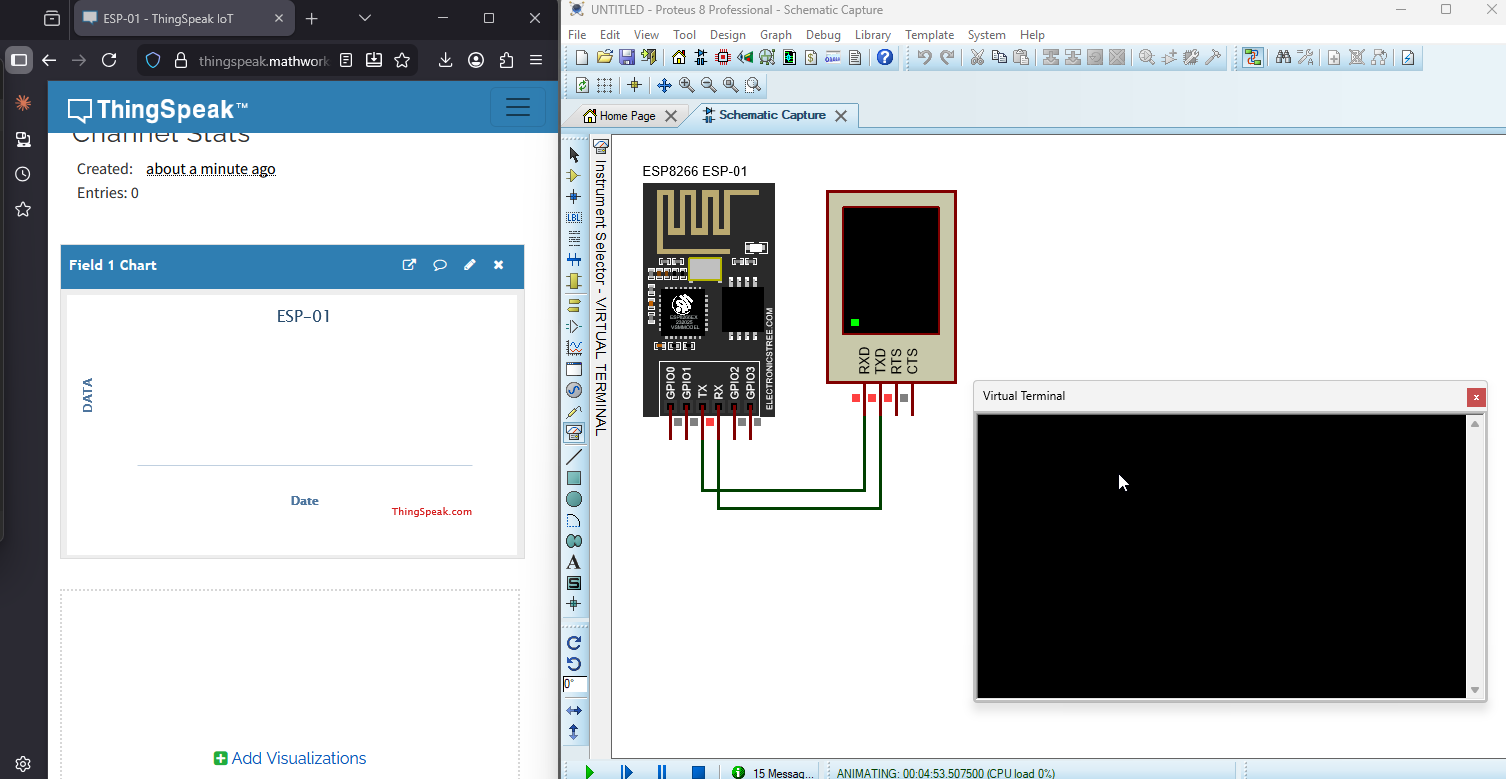
ESP-01 Proteus Simulation Setup
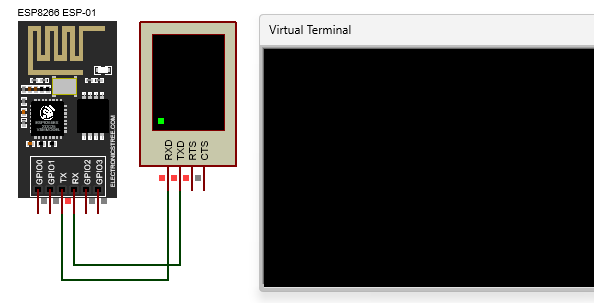
In the ISIS editor, place the ESP-01 Proteus simulation model. To communicate with the ESP-01, you can use the Proteus Virtual Terminal, the Arduino Serial Monitor, or any other serial interface. For this tutorial, I will be using the Virtual Terminal.
In this tutorial, we are not reading data from an actual sensor inside Proteus.
- Testing HTTP client functionality
- Checking if ThingSpeak accepts data
- Verifying HTTPS communication
- Ensuring the ESP-01 Proteus Simulation model sends data correctly
Later, you can replace these with real sensor values when implementing LM35, DHT11, DS18B20, etc.
Sending Data to ThingSpeak Using AT+HTTPCLIENT
The ESP-01 Proteus Simulation model uses this command:
AT+HTTPCLIENT=<method>,<content-type>,"<URL>",<body>, <transport>
For ThingSpeak GET updates, the method value is 2, which corresponds to an HTTP GET request. The content type is set to 0, and the body remains an empty string since GET requests do not send data in the body. The transport value is 2, indicating that the request should be sent using HTTPS.
So the structure becomes:
AT+HTTPCLIENT=2,0,"<your-url>",2In the command, the <your-url> placeholder is where you must insert your full ThingSpeak API request. For example:
AT+HTTPCLIENT=2,0,"https://api.thingspeak.com/update?api_key=V4UQM5FLKVESUNVN&field1=25",2Now run the simulation and connect to the network using the AT+CWJAP command. Make sure to use SSID = ELECTRONICSTREE and PASS = ADMIN so the ESP-01 can operate as a client and send data to external servers.
AT+CWJAP="ELECTRONICSTREE","ADMIN"
After the ESP-01 Proteus Simulation model successfully connects, type or paste the HTTP command into the terminal and press Enter. You will then receive the following response.
Expected Response
+HTTPCLIENT:200,<length>
<entry_number>
OK
ThingSpeak returns an entry number (1, 2, 3…) when data is accepted.
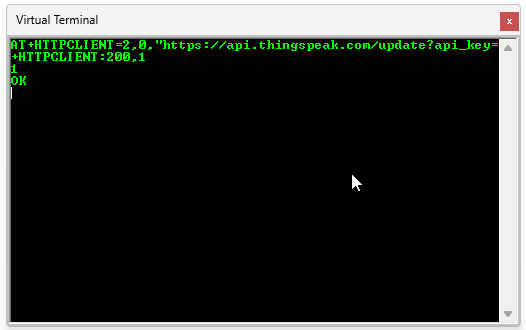
In this response, the status code HTTP 200 indicates that the request was successful, and the value 1 shows that Entry ID #1 has been created in your ThingSpeak channel.
To update the data, you only need to change the value in your command and send it again. Everything else in the command remains exactly the same. For example, to send a new value, simply replace the previous value with 26 and execute the command.
AT+HTTPCLIENT=2,0,"https://api.thingspeak.com/update?api_key=V4UQM5FLKVESUNVN&field1=26",2
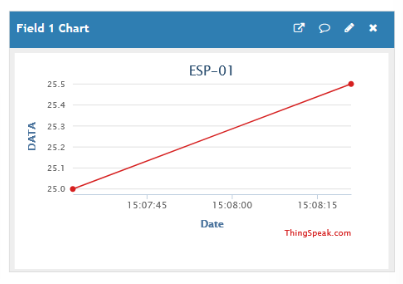
Viewing the Data on ThingSpeak
To view the data you have sent, go to your ThingSpeak channel page and open Channel → Private View. Then, check the Field 1 chart, where you will see the values that were successfully uploaded from your ESP-01.
What’s Next in ESP-01 Proteus Simulation?
In this tutorial, we successfully tested the ESP-01 Proteus simulation model by sending test values to ThingSpeak using the AT+HTTPCLIENT command. You configured ThingSpeak, used the ESP-01 simulation model, sent HTTPS requests from Proteus, verified cloud communication, and logged real entries to the cloud with test data. This demonstrates that the ESP-01 simulation model can fully interact with online IoT platforms without requiring any physical hardware.
In the next tutorial, we will take this one step further, we’ll connect an Arduino to the ESP-01 simulation model inside Proteus, read actual sensor values, and then upload those readings to ThingSpeak automatically. This will complete the full IoT workflow from sensor → Arduino → ESP-01 → Cloud using only simulation.
Download Library
Simply click on the button to download the library. You can refer to this post for instructions on how to install the library in Proteus 8. How to Download and install Library in Proteus (electronicstree.com)
ZIP Password : electronicstree.com
We’re always looking to expand our library collection based on what our community needs. If you’re looking for a specific Arduino module, sensor, or component that we don’t currently offer, we’d love to hear from you!
Reach out to us at help@electronicstree.com with your requests. We prioritize new library development based on community demand, so your suggestion could be our next addition.

