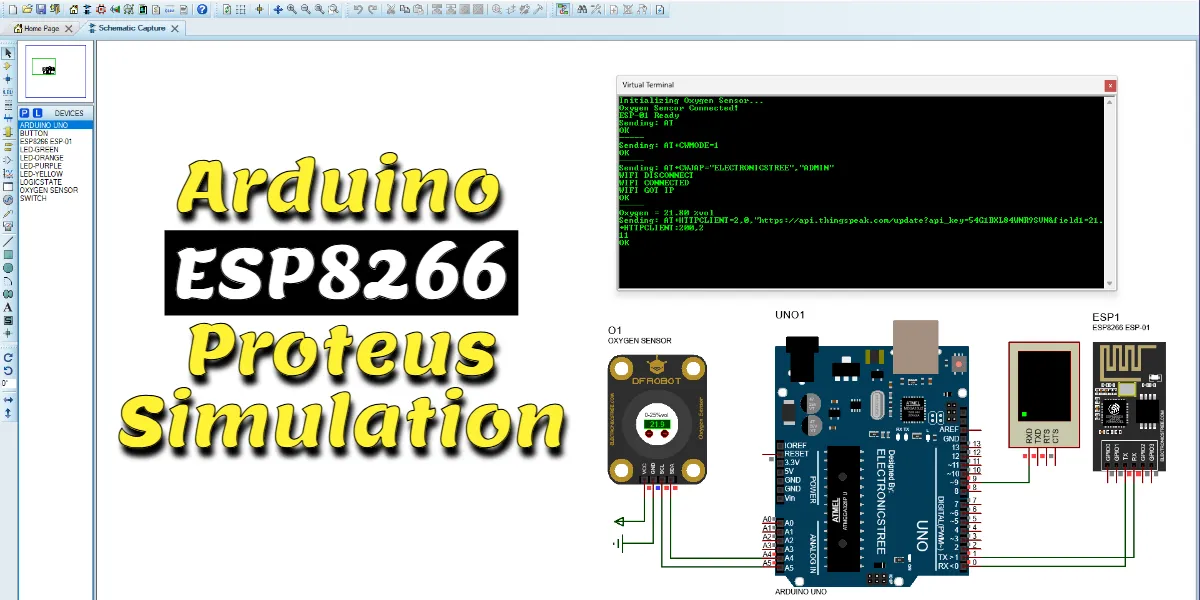
This tutorial will guide you through an easy and accurate Arduino ESP8266 Proteus simulation for building an IoT Oxygen Monitoring system using an Arduino Uno, a DFRobot Oxygen Sensor, and the ESP8266 ESP-01 simulation model in Proteus.
This project combines two powerful Proteus library modules: an oxygen sensor for air quality measurement and an ESP-01 Wi‑Fi module for cloud connectivity, all simulated in Proteus.
Arduino ESP8266 Proteus Simulation Overview
The core of this project is the DFRobot Gravity: I2C Oxygen Sensor (SEN0322), an electrochemical sensor capable of measuring ambient oxygen concentration with a range of 0-25% Vol. It communicates via the I2C interface, making it easy to integrate with an Arduino UNO. The sensor data is then transmitted by the ESP-01 module, acting as an HTTP client, to the ThingSpeak cloud platform, where it can be visualized, stored, and analyzed in real time.
The ESP8266 ESP-01 advanced simulation model for Proteus is a key part of this guide. This model is built carefully to reflect real‑world ESP8266 behaviour, offering accurate AT command processing, Wi‑Fi connectivity simulation, TCP/IP networking, GPIO interaction, webserver functionality, and HTTP client features, all directly inside Proteus. The simulation model uses your PC’s networking system to perform DNS lookups, open sockets, and communicate over HTTP/HTTPS, which means your Windows PC must have working internet access; otherwise, the simulated ESP-01 cannot reach any server.
Components & Libraries Required
- Proteus 8 Professional (any version)
- ESP-01 Proteus Simulation Model (from Electronics Tree)
- Download: Electronics-Tree-ESP8266-Module-Library.zip
- Password: electronicstree.com
- DFRobot Oxygen Sensor Proteus Library
- Download: Electronics-Tree-Oxygen-Sensor-Library.zip
- Password: electronicstree.com
- Arduino IDE (to compile the sketch to .hex)
Installation Tip: Follow the official guide
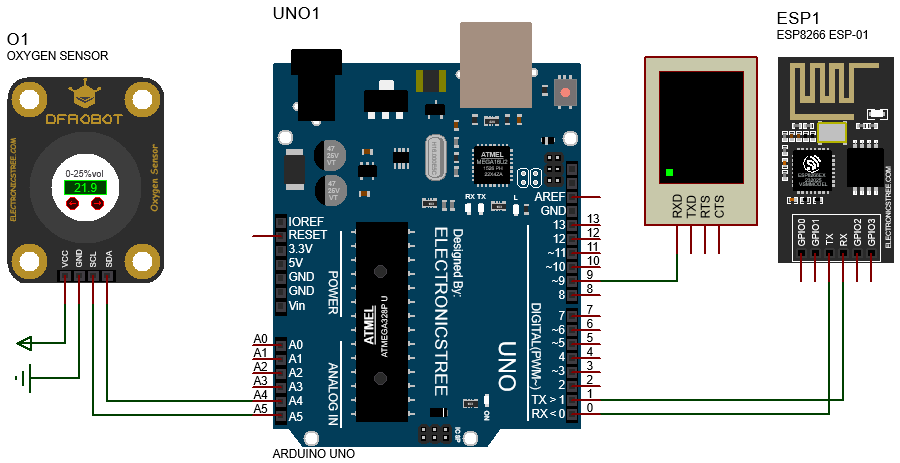
Circuit Diagram (Proteus ISIS)
Since the ESP01 Proteus model simplifies the physical module, you don’t need to worry about power pins (VCC/GND) or enable pins (CH_PD). Focus on the communication lines:
| Component | Arduino Uno Pin | Description |
| ESP-01 RX | Pin 1 (TX) | Serial data from Arduino to ESP |
| ESP-01 TX | Pin 0 (RX) | Serial data from ESP to Arduino |
| Oxygen SCL | Pin A5 (SCL) | I2C Clock |
| Oxygen SDA | Pin A4 (SDA) | I2C Data |
| Virtual Terminal | Pins 8 & 9 | Debugging output via SoftwareSerial |
Arduino Code
The provided Arduino code is responsible for reading the oxygen sensor data and sending it to the ESP01 module, which then forwards it to ThingSpeak.
Code Overview and Structure
SoftwareSerial: Debugging without interfering with the ESP-01.oxygen.begin(): Initialises the I2C oxygen sensor.AT+CWMODE=1: Sets ESP‑01 as a Wi‑Fi client.AT+CWJAP: Connects to your Wi‑Fi network.oxygen.getOxygenData(): Reads oxygen concentration (%Vol).AT+HTTPCLIENT: Sends an HTTPS GET request to ThingSpeak.sendToESP(): Sends any AT command and prints the response.delay(20000): Respects ThingSpeak’s 15‑second update limit.
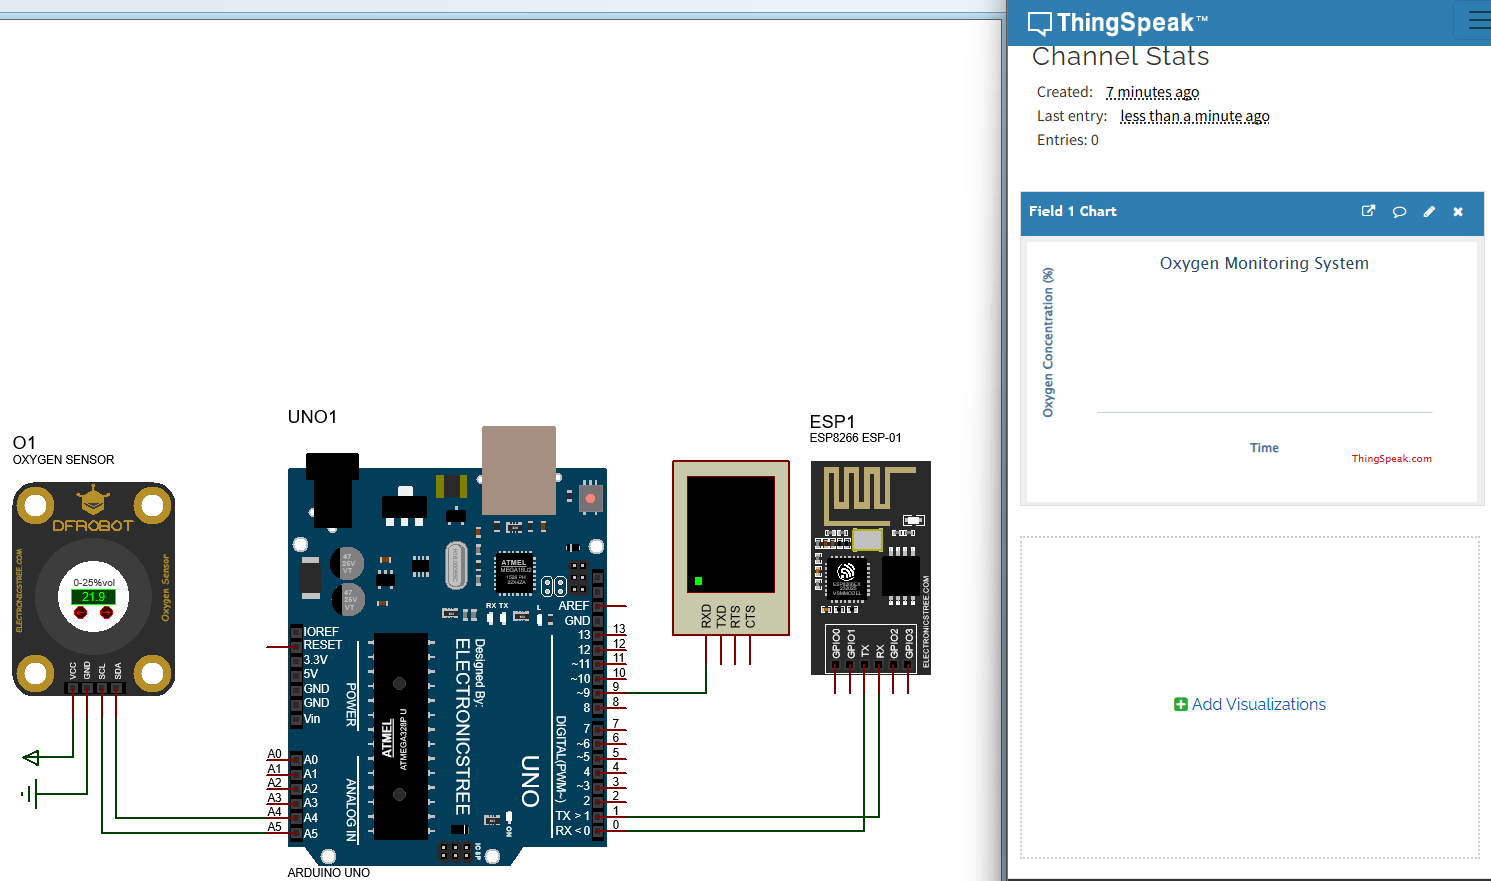
Setting Up the ThingSpeak Channel
ThingSpeak is an open IoT platform that allows you to collect, store, analyse, and visualise data from your devices. Here’s how to create your channel:
- Create an Account: Go to
thingspeak.comand sign up for a free account (if you don’t already have one). - Create a New Channel: Once logged in, navigate to the “Channels” tab and click “New Channel”.
- Configure the Channel:
- Give your channel a name (e.g., “Oxygen Monitoring System”)
- Add a description (optional)
- For Field 1, set the name to “Oxygen Concentration (%)”
- You can leave other fields empty for now
- Save the Channel: Click “Save Channel” at the bottom of the page.
- Get Your API Key: After saving, go to the “API Keys” tab of your channel. You will see a “Write API Key” (a unique alphanumeric string). This key is required for your Arduino code to send data to ThingSpeak. Copy it and keep it safe, you will need it in the Arduino code.
The API key in the provided code (QT22SQ20PB8U3X72) is a placeholder. You must replace it with your own Write API Key.
Arduino ESP8266 Proteus Simulation Demo
We’re always looking to expand our library collection based on what our community needs. If you’re looking for a specific Arduino module, sensor, or component that we don’t currently offer, we’d love to hear from you!
Reach out to us at help@electronicstree.com with your requests. We prioritize new library development based on community demand, so your suggestion could be our next addition.
Join the official WhatsApp channel of ElectronicsTree to stay updated with the latest electronics tutorials, Proteus libraries, Arduino projects, and simulation resources.