Today, I want to show you a pretty cool way to send data from Blender to Arduino, allowing your digital creations to interact with the physical world. Now, if you’ve been following along with my previous posts (and if not, no worries, you can always check out the Blender category!), we’ve mostly been doing the opposite. We’ve been grabbing data from Arduino like, remember that potentiometer hooked up to control a 3D LED in Blender? Yeah, stuff like that.
This time, we’re flipping the process. Instead of reading input from Arduino, we’ll create a virtual potentiometer in Blender, animate it using node modifiers, and then send that data from Blender to Arduino to control the brightness of a real LED. It’s a fun and practical way to bring your Blender animations to life in the physical world.
Blender to Arduino Prerequisites
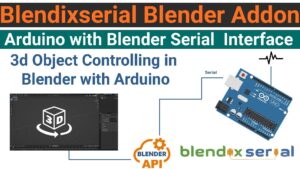
To make this happen, we’re going to use a fantastic little add-on for Blender called blendixserial. What makes it even better is that there’s also an Arduino library with the same name designed to work hand-in-hand on the Arduino side. This combination is specifically built for handling serial communication between Blender and microcontrollers like Arduino, making the whole process much smoother than trying to roll your own script from scratch.
To get started with the blendixserial Addon for Blender and its corresponding Arduino library, you can download both from these sources:
📦 Downloads:
You’ll also need:
Blender 4.2 or higher. This is crucial for sending data from Blender to Arduino using blendixserial. If you’re using an older version like Blender 3.x, this specific functionality won’t work.
- Heads up for Blender 3.x users: While the latest blendixserial won’t work for sending data out of Blender to Arduino, you can still download the older blendixserial v0.12 addon. Just know that this older version only supports sending data from Arduino to Blender.
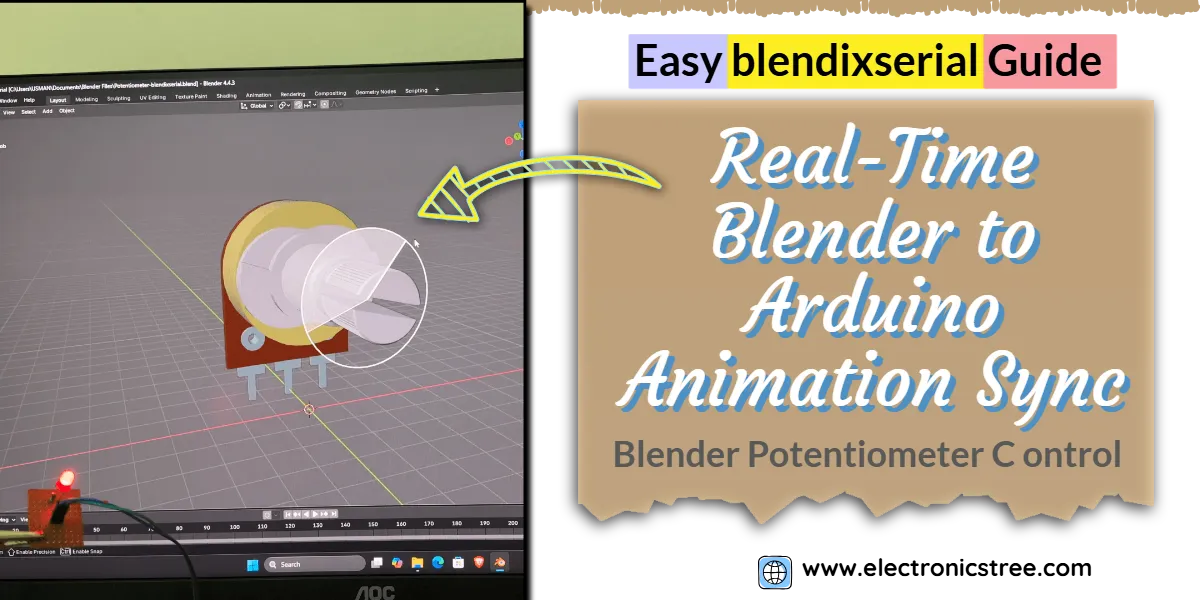
Create Your Virtual 3D Potentiometer
For this tutorial, I modeled a 3D potentiometer with all its individual pieces. The idea was to keep the knob separate from the main body, that way, we can easily animate just the knob’s rotation later on. All the other parts are joined to create the final base of the potentiometer.

If you prefer not to model, you can download a potentiometer asset from the web. Just ensure you either separate the knob within Blender or simply use a basic cylinder as a stand-in for the rotating element.
Setting Up the Potentiometer Control Animation
A standard single-turn potentiometer typically rotates through approximately 270 degrees, which is about three-quarters of a full 360-degree rotation (or about 4.712 radians). When animating our virtual knob, we’ll want to ensure its rotation is limited to this range.
There are a couple of ways to achieve this:
- Keyframed Animation: The simplest method is to apply keyframes directly to the knob’s rotation property. In my case, I applied keyframes specifically to the Y-axis rotation of the knob. This allows you to set the start and end rotation points precisely within the 270-degree range.

- Manual Control: For more simplest method, you could use a driver to control the knob’s rotation, linked to another property (like a custom property slider). Alternatively, for live testing or manual adjustments, you can directly change the knob’s Y-axis rotation value in the Transform panel.

Animating with Geometry Nodes: For even more powerful and procedural animation control, Blender’s Geometry Nodes are a fantastic option. They let you build complex animation logic visually. As you can see, you can even drive the knob’s rotation directly with your mouse in the 3D viewport! This interactive control is thanks to the Dial Gizmo node, which is super handy for manipulating angles.

So now, the choice is yours! You can pick the method that best suits your project. How you make it even better, or what other creative approaches you use for animation and data extraction, that’s all up to you. Blender is your playground, and the stage is yours!
Writing the Arduino Code using blendixserial Library
So, if Blender is now sending data through the add-on, how do we correctly read that in our Arduino sketch.
Serial Setup: Why Two Ports?
For cleaner serial communication and easier debugging, a separate port for your debug messages is highly recommended. If your Arduino board, such as a Mega, offers multiple hardware serial ports, it’s best to use one for your blendixserial data and the other for Serial.print statements. For boards with a single hardware serial port (like the Uno or Nano), you can create a secondary debug channel using the SoftwareSerial library with a USB-to-TTL converter. Or, if absolutely necessary, you might have to skip debugging during your data transfer tests.
Okay, so how do we actually receive data using the blendixserial Arduino library?
The very first thing you need to do, whether you’re sending or receiving, is tell the BlendixSerial library how many distinct data “sets” you’ll be working with. For receiving, you’d use:
blendix.setRxSets(1);
This command instructs the library to expect one set of incoming data (a set of coordinates).
The best practice for reading the actual data coming from Blender is to process it byte by byte from the serial buffer, accumulating it until a complete message is formed. Here’s a typical way to do that:
while (Serial.available()) {
  char receivedChar = Serial.read();
  serialData += receivedChar;}
Once you’ve gathered enough characters, the magic happens with the blendix.parseReceivedData() method. This function’s job is to validate and interpret the incoming data. It checks if serialData is a properly formatted message (like the coordinate strings blendixserial addon sends). If it’s valid and complete, the data is parsed and stored internally for you to grab. If it’s still incomplete or garbled, the method simply waits for more data to arrive.
if (blendix.parseReceivedData(serialData)) {
  // The string was valid and stored internally
  serialData = ""; }
After successfully incoming Data, you can proceed to extract the transmitted values. For data sent as coordinates (e.g., X, Y, Z positions), the retrieval method is as follows:
float x, y, z;
blendix.getReceivedCoordinates(0, x, y, z);
We want to control the brightness of an LED based on the Y coordinate:
int brightness = map((int)y, 0, 270, 0, 255);
brightness = constrain(brightness, 0, 255);
analogWrite(LED_PIN, brightness);
As the virtual knob rotates in Blender, LED dims/brightens in real-time. Here’s the full code:
blendixserial - Using 3D Potentiometer to Control a LED
Next up, in the blendixserial panel itself, you’ll see a couple of crucial sending options: “Timer based” or “Keyframe based.”
- If your animation is purely driven by keyframes on Blender’s timeline, go with “Keyframe based.” blendixserial will sync with your animation playback.
- However, if you plan to control your animation interactively, via drivers, or through live Geometry Node manipulation (like using the Dial Gizmo), then “Timer based” is your friend. This mode ensures data is sent continuously as values change.
Personally, since I’m using a driver-based method (which involve a Geometry Nodes setup with the Dial Gizmo), I’ll definitely be choosing “Timer based.” For my specific setup, I’ve linked the Dial Gizmo’s output to an Empty object, and then connected that Empty object’s Y-axis rotation property in blendixserial.
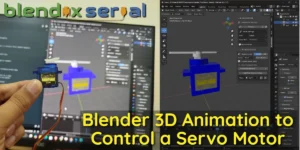
Once everything’s connected in blendixserial, hit that “Start Sending” button! Now, go ahead and interact with your Blender scene, as you rotate the virtual knob, watch your real LED brighten or dim in sync! And get this: you’re not just limited to LEDs; this opens up possibilities for controlling servos, stepper motors, and a whole world of physical devices!

you can also grab the project files from Gumroad – I just started there, so your support would be awesome and help keep me motivated to make more content!”