Arduino Tank Level Control: 3D Water Tank Simulation with Blender

Arduino Tank Level Control: 3D Water Tank Simulation with Blender

You are currently viewing Arduino Tank Level Control: 3D Water Tank Simulation with Blender

Arduino Tank Level Simulation

Today, we’ll be creating an Arduino Tank level Simulation using Proteus and Blender. In the previous post, we interfaced a sound sensor and created a 3D visualization in Blender. So, in this post, we’ll be making a water tank in Blender and controlling it from Proteus.

Components

Proteus Setup

Arduino Tank Level Proteus Simulation:

The Arduino Tank level control simulation in Proteus has already been discussed in detail in an earlier post, so I’m not going to repeat it here. You can check out that post if needed. Instead, we will focus on how to send Arduino Tank level data from Proteus to Blender. We’ll make a few modifications to the Arduino code used in the level control using the BlendixSerial Arduino library.

Arduino Tank Level Code:

Here is the code with modifications that reads the analog output from the sensor and converts it to a meaningful tank level. The code is simple; I will explain it later, focusing only on the portions related to controlling the Blender animation.

Blender Setup

blendixserial - An addon and Library:

Blendixserial A key component of this setup, it is a Blender add-on, and there is also a separate library for Arduino with the same name. If you didn’t know about this amazing add-on and library, check out this video for a clear understanding.

Water Tank Modeling in Blender:

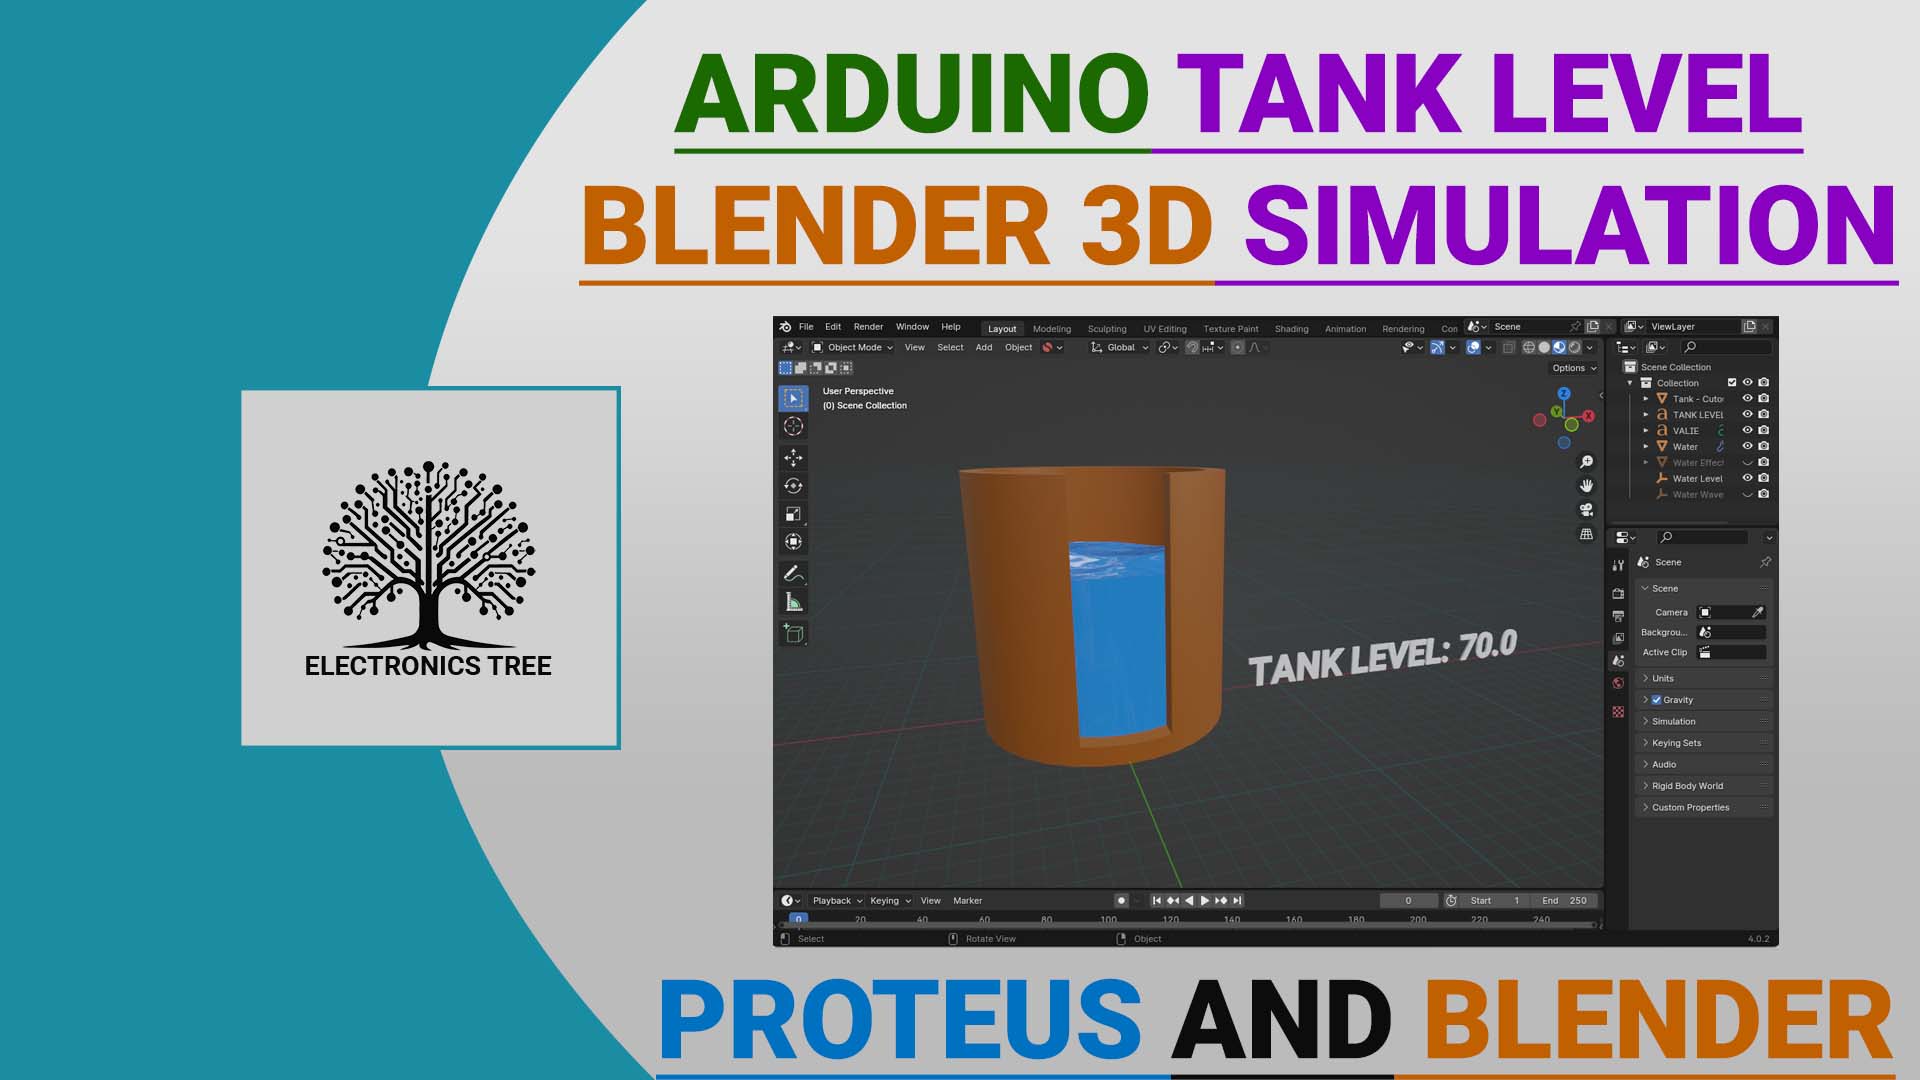
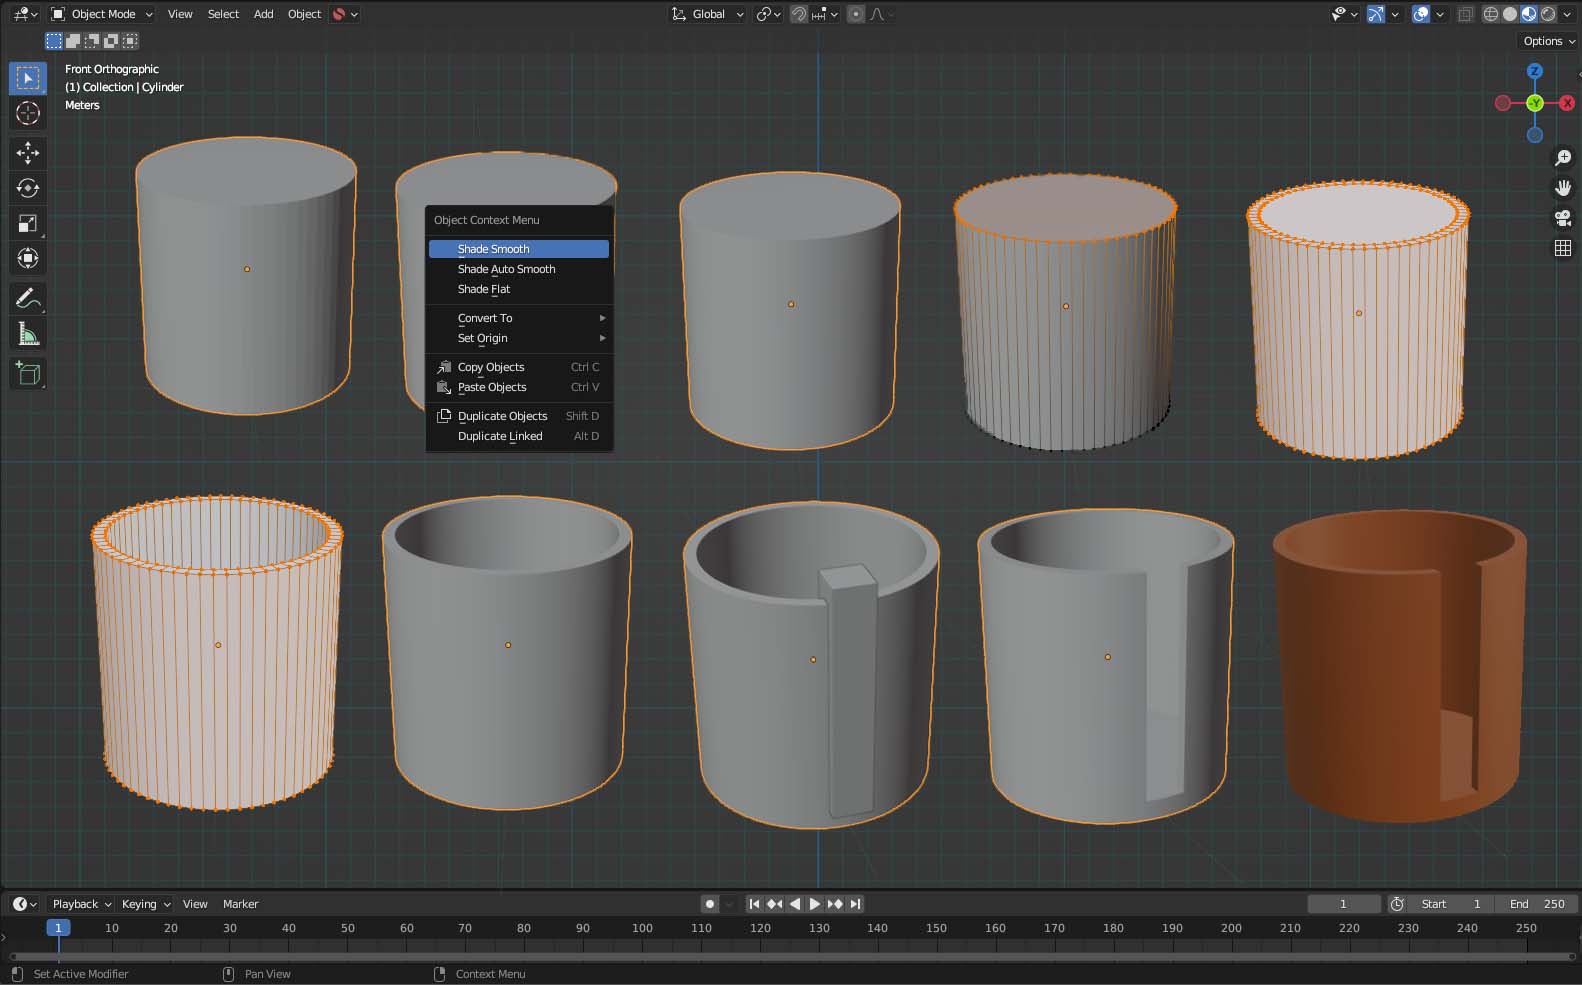
To create a tank, add a mesh cylinder and set the vertices to 64. Scale the cylinder to a value of 6. Right-click on the cylinder and select the “Shade Smooth” option. In the Data tab, select the Normal properties and check the box for “Auto Smooth”. In edit mode, select the face vertices of the cylinder, press “E” for extrude, then hit enter. Scale with a value of 0.9. Press “E” again, hit enter, and grab to the inside of the cylinder to hollow it out. Make adjustments as needed. Now, create a cut-view on one side using the boolean modifier. Your simple tank model is now ready.

Arduino Tank Level Control - Tank Modeling
Tank-Modeling

Creating Water inside the Tank:

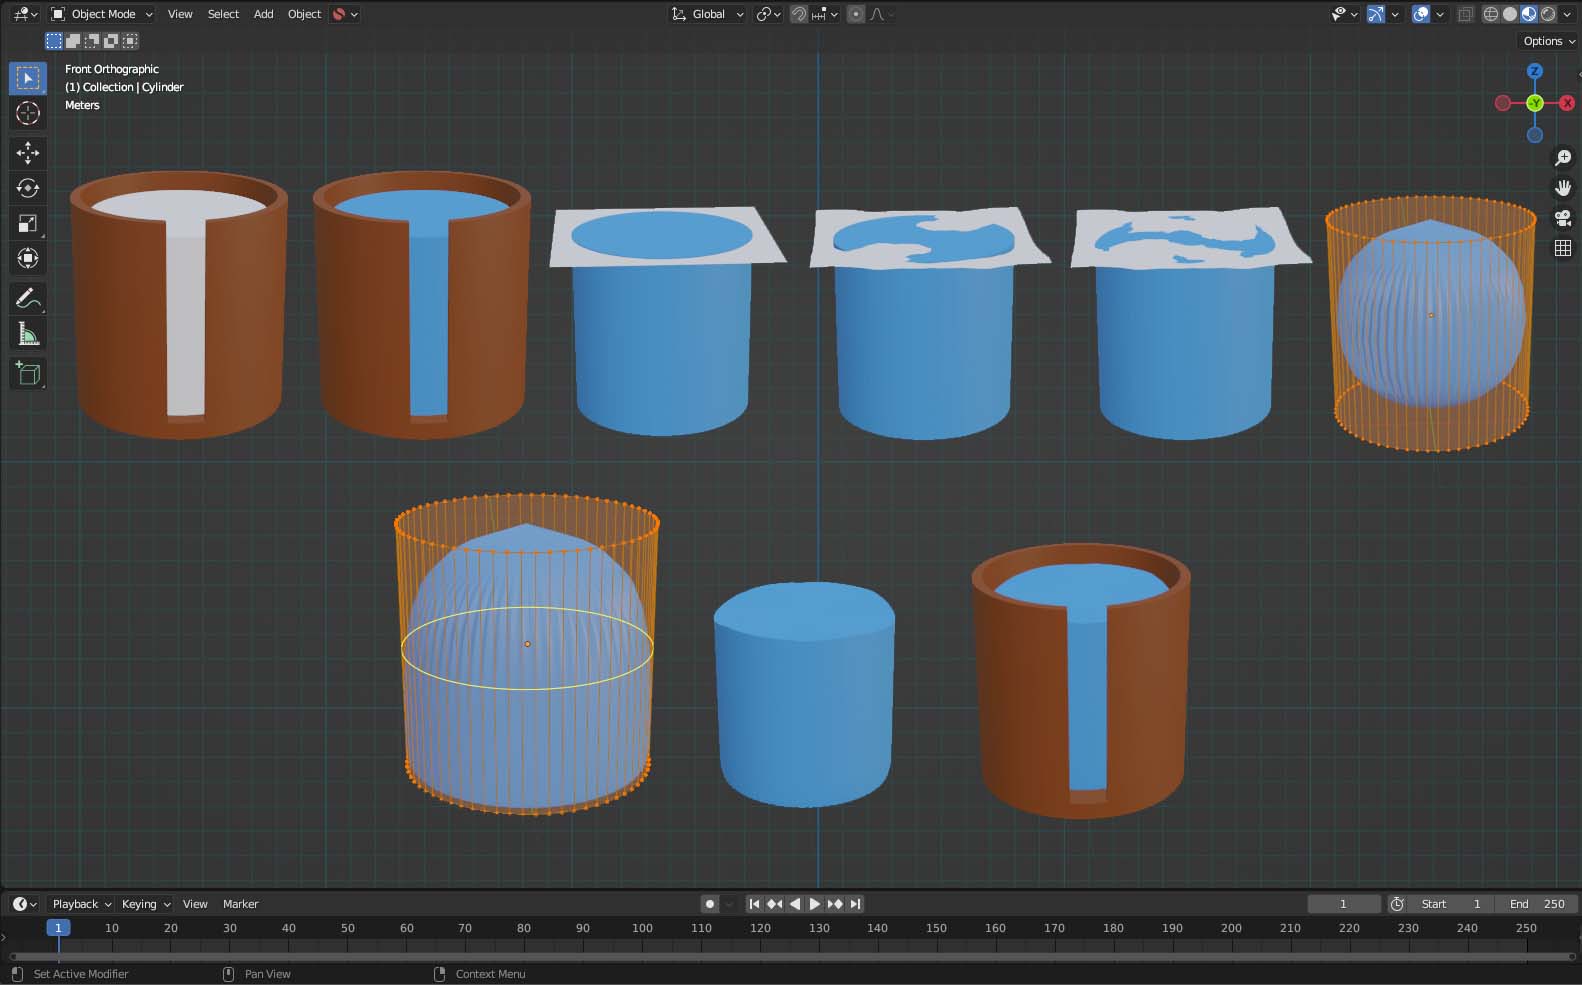
Now, let’s create water inside this tank. For this, create another mesh cylinder with the same number of vertices and shade smooth option. However, scale it with a value of 5 units. Add material to give the water color. Hide the tank and add a plane on top of our new cylinder. Apply the ocean modifier to the plane and shrink wrap modifier to the cube.

Arduino Tank level Control - Water inside Tank
Modeling Water inside the Tank

In the shrink wrap modifier, set the project as the wrap method and outside surface as the snap mode. Also, set the axis to z and tick the negative option. Hide the plane and apply the subdivision modifier to the cylinder. Add loop cuts to fix the sharp edges and refine the cylinder surface. Unhide the tank body, and your tank with water model is ready.

Water Level and Wave Effect Animation - Arduino Control

In the Arduino Tank level Simulation in Blender, two animations are involved: water wave animation and water level animation. First, we create the wave animation for the water. You can control the water level only from Arduino, and for the water wave effect, you can animate it in Blender using keyframes. However, we can control both animations with the Arduino without involving keyframes. Let’s check the Arduino code, specifically the for loop part, for this.

Water Wave animation control:

In this Arduino code, the for loop iterates from 1 to 15, controlling the position of the second object along the x-axis. Inside the loop, blendix.setCoordinates() sets the coordinates of the second object using the current loop variable i. The formatted output is retrieved and sent to the serial connection.

 for (int i = 1; i <= 15; i++) {
blendix.setCoordinates(2, i,0,0);
String Output = blendix.getFormattedOutput();
Serial.println(Output);
}

We will use this loop value for the water wave effect using the Blender driver. First, add a single empty arrow and copy the x location as ‘copy as New Driver’ option. Now, go to the ocean modifier settings (applied to the plane) and paste this driver on the time setting option of the modifier. Now, when you move the empty arrow on the x-axis, it will create the wave effect on the water. So, in the 2nd object tab of the addon, select this empty and choose the x-axis. When this value is received from Arduino, the water will wave.

Water Level animation control:

In the second part of the code, we map the sensor value from the range of 0 to 1023 to a range of 0 to 10 for tankLevel and 0 to 100 for LevelValue. Using the setCoordinate function, we assign these values to the y and z axes. 

 int sensorValue = analogRead(SENSOR_PIN);
int tankLevel = map(sensorValue, 0, 1023, 0, 10);
int LevelValue = map(sensorValue, 0, 1023, 0, 100);
blendix.setCoordinates(1, 0,LevelValue,tankLevel);
String Output = blendix.getFormattedOutput();
Serial.println(Output);

The tankLevel variable values control the water level, while the LevelValue variable values show the level in the viewport using 3D text. To animate the level, we use the same method of Blender driver as for the wave animation, but now the location should be on the z-axis. To display the level in the viewport, select the text in the “See value” option and check the Y option, as we send the Level Values on the y-axis.

Proteus and Blender - Virtual Connection

To connect Proteus and Blender, a virtual COM port emulator is required. This software program replicates the behavior of a physical serial port (COM port) on your computer.

Your Arduino Tank Level Animation is ready. You can use Proteus or even implement the hardware setup; it works for both. So, you can use different sensors with this for Arduino Tank Level control.

Blender File

You can download the Blender file by clicking the above download button. ZIP Password: electronicstree.com

Visit for more guides on Proteus and Blender projects. If you have any questions or suggestions regarding Arduino Tank Level Control, please leave a comment.

Leave a Reply

This Post Has One Comment

  1. Lupini David

    Muito bom o site, gostaria que tivesse a biblioteca do finger print