So you want to add some AI smarts to your Proteus simulation? The Neural Tree Lens is basically a AI Camera that can look at your computer screen and tell you what it sees. It’s pretty neat – you can prototype AI vision systems without buying expensive hardware.
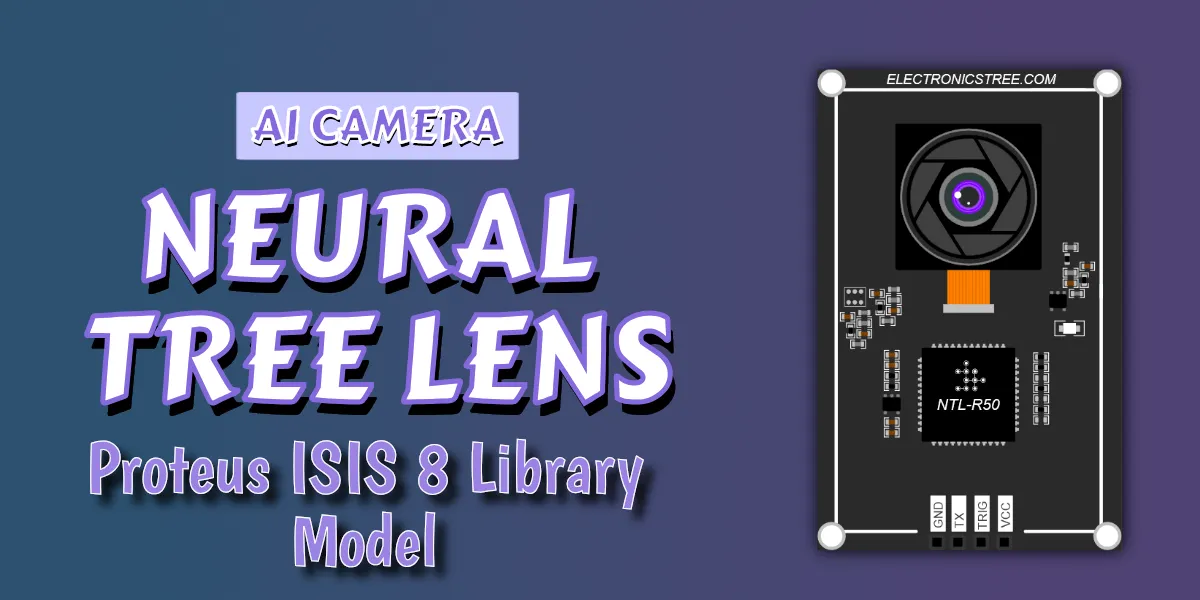
Neural Tree Lens (NTL) – AI Camera Model
The Neural Tree Lens (NTL) is a Proteus VSM digital simulation model that emulates the behavior of an AI-powered camera module.
This model combines image capture with deep neural network inference, enabling the simulation of intelligent vision systems inside Proteus. Unlike conventional sensors, NTL uses a trained neural network to recognize objects, making it suitable for advanced embedded system projects that involve machine learning.
Key capabilities
- Capturing a defined region of the PC screen during simulation.
- Running classification using the ResNet-50 deep learning model.
- Delivering results as plain-text messages over a UART interface.
- Being triggered externally via a digital control pin.
The NTL provides a practical way to prototype and test AI-enhanced embedded systems without requiring specialized hardware.
AI Engine: ONNX Runtime and ResNet-50
The NTL AI Camera model internally integrates a complete AI inference pipeline built upon two widely recognized technologies: ONNX Runtime and ResNet-50.
ONNX Runtime
- ONNX (Open Neural Network Exchange) is an open standard for representing deep learning models trained in frameworks such as PyTorch, TensorFlow, or Keras.
- ONNX Runtime is a high-performance inference engine developed by Microsoft. It is optimized to run ONNX models efficiently across platforms.
- In NTL, ONNX Runtime is embedded into the simulation model. It is responsible for loading the ResNet-50 model and executing classification whenever triggered.
ResNet-50
- ResNet-50 is a 50-layer Convolutional Neural Network (CNN).
- It was trained on the ImageNet dataset, which consists of over 1.2 million images across 1000 categories.
- ResNet-50 introduced the concept of residual connections, which made it possible to train very deep networks effectively.
- When an image is processed, the network outputs a vector of 1000 confidence values, each corresponding to one ImageNet class.
Integration in NTL AI Camera
- ONNX Runtime acts as the execution engine.
- ResNet-50 provides the pretrained intelligence for classification.
- Together, they allow the NTL model to simulate an intelligent camera capable of object recognition inside Proteus.
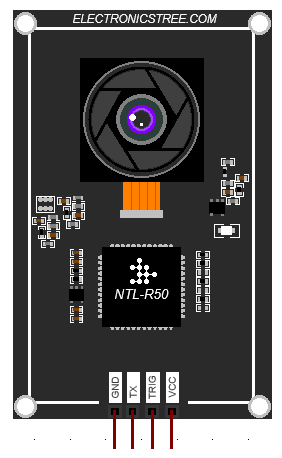
AI Camera Pinout and Signals
The AI Camera model has four external pins:
| Pin | Type | Description |
|---|---|---|
| VCC | Power Input | Must be connected to a valid 5V supply. |
| GND | Power Input | Must be connected to ground. |
| TRIG | Digital Input | A rising edge initiates image capture and inference. If the model is busy, additional triggers are ignored. |
| TX | Digital Output | UART transmit pin. Classification results are transmitted as text messages. |
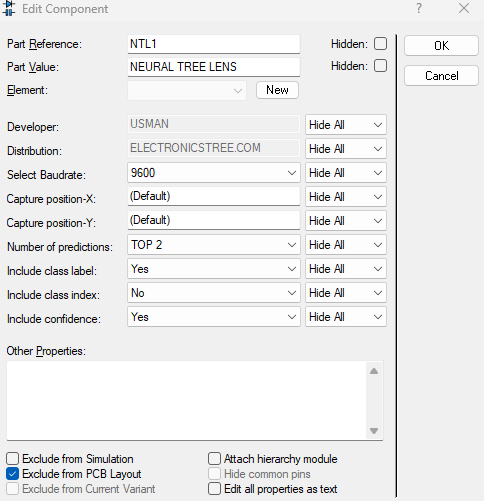
AI Camera Properties
The Neural Tree Lens (NTL) model includes several configurable properties that allow you to adjust both how the module behaves and how the output is formatted. All of these can be set from the Component Properties dialog in Proteus.
Select Baud Rate
The first property is Baud Rate, which sets the communication speed of the UART output on the TX pin. The default value is 9600 baud, but you can change this to match your microcontroller or virtual terminal. Both the NTL model and the receiving device must use the same baud rate.
Screen Capture Position
The Screen Position X and Screen Position Y settings control where on your computer screen the model takes its picture. The capture area is always 224×224 pixels. By default the capture window will be placed in the center of the screen. If you want the model to look at a different part of your screen, you can type in pixel values. Screen X sets the horizontal position (from the left edge of the screen), and Screen Y sets the vertical position (from the top of the screen).
Number of Predictions
This property controls how many classification results are returned after each inference. TOP 1 means that only the single most likely class will be reported. Increasing this value to TOP2 and TOP3 will return the top two or three predictions, separated by the “|” character.
Class Label , Index and Confidence
The last three settings control how much detail is shown in the output. Include class label decides if the model should include the class name, like “dog” or “car.” This is turned on by default. Include class index decides if the numeric class ID from the ImageNet dataset is included. This is turned off by default. Include confidence decides if the confidence score (a number showing how sure the model is) is included. This is turned on by default.
By changing these options, you can make the output as simple or as detailed as you like. For example, you can just get the name of the object, or you can also get the class ID and confidence score along with it.
UART Output Format
Results are transmitted through the TX pin as plain-text messages enclosed in < >. General format
<NTL:label;class=ID;conf=VALUE>
Examples:
Top-1 result with label, class ID, and confidence:
<NTL:golden retriever;class=207;conf=0.98>- Top-3 results with confidence only:
<NTL:tabby cat;conf=0.75|tiger cat;conf=0.15|Egyptian cat;conf=0.05>
- Label only (minimal output):
<NTL:coffee mug>All messages are terminated with carriage return and line feed (\r\n) for direct compatibility with UART terminals or microcontroller serial input.
Using the AI Camera
To integrate NTL into a Proteus project:
- Place the NTL component in the schematic.
- Connect pins:
- Connect VCC and GND to +5V and ground respectively.
- TX → virtual terminal or MCU RX pin.
- TRIG → digital signal source (e.g., microcontroller GPIO, switch, or pulse).
- Configure properties (baud rate, capture position, etc.).
- Prepare screen content: Ensure the object to be classified is visible in the defined capture region (224×224 pixels).
- Run simulation:
- A rising edge on TRIG initiates capture and inference.
- After processing, results appear on the TX line as UART messages.
Notes and Limitations
- The AI Camera model uses live screen capture from the host PC. Ensure the capture area is not obstructed by other windows.
- Only one inference can run at a time. TRIG pulses during processing are ignored.
- The model depends on the presence of external files in the same folder:
onnxruntime.dll(runtime engine)resnet50-v1-7.onnx(pretrained model)imagenet_classes.txt(class labels)
- Accuracy is limited by the pretrained ResNet-50 model and may not match custom objects or datasets.
Single-instance limitation
- Only one AI Camera component can be used in a simulation.
- Adding multiple instances may cause errors such as:
Internal Exception: access violation in module 'NTLR50.DLL'
or result in Proteus freezing or crashing.
Example Applications
- Prototyping AI-assisted IoT devices within Proteus.
- Simulating an intelligent vision sensor connected to a microcontroller.
- Educational demonstrations of deep learning integration in embedded systems.
- Proof-of-concept projects where UART-based AI modules are required.
Download Library
Simply click on the button to download the AI Camera library. You can refer to this post for instructions on how to install the library in Proteus 8. How to Download and install Library in Proteus (electronicstree.com)
ZIP Password : electronicstree.com
We’re always looking to expand our library collection based on what our community needs. If you’re looking for a specific Arduino module, sensor, or component that we don’t currently offer, we’d love to hear from you!
Reach out to us at help@electronicstree.com with your requests. We prioritize new library development based on community demand, so your suggestion could be our next addition.
Required External Files
AI Camera model depends on three external files that must be placed in the same folder 📂 as the NTL DLL. I’ll give you the official sources where these files can be downloaded.
ONNX Runtime DLL
This is the inference engine that executes the AI model.
- Download page: ONNX Runtime Releases
- Choose the x86 (win32) package. For example:
onnxruntime-win-x86-1.20.1.zip
- From the ZIP, extract
onnxruntime.dlland copy it to the same folder asNTLR50.DLL.
⬇️ One-Click Download: onnxruntime-win-x86-1.20.1.zip
ResNet-50 Model File
This is the pretrained image classification model.
- Download Page (ONNX Model Zoo): ResNet-50 Model
- Save the file as
resnet50-v1-7.onnxin the DLL folder.
⬇️ One-Click Download: resnet50-v1-7.onnx
ImageNet Labels File
This file contains the 1000 ImageNet class names (one per line). save this file as imagenet_classes.txt in the same folder as the DLL and model.
⬇️ One-Click Download: imagenet_classes.txt
I’m having a problem sir, it says ” External model DLL “NTLR50.DLL”
hi Ishaq.!
Which Proteus version are you using 8 or 9?